Well I’ve promised this awhile ago and I’m finally getting around to it. The second version of the How To Build an Upside Down Tomato Planter using a method described by Amber.
What you Need:
A 2 liter bottle
Water
The ability to heat water
A sharp knife
A plant
Potting soil
Optional:
coffee filter
Jiffy starter

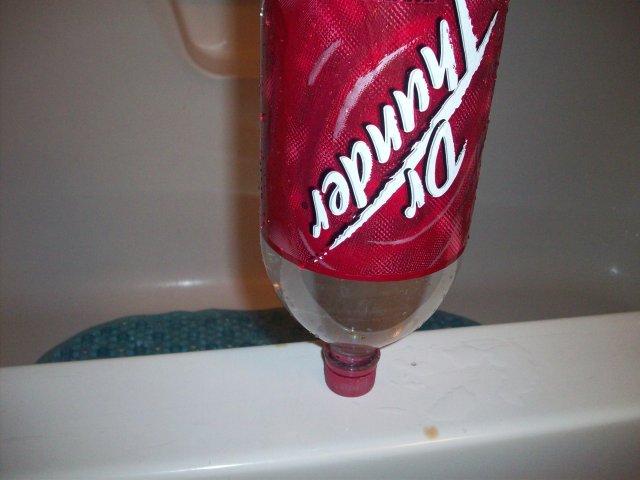
So we start off with your run-of-the-mill 2-liter bottle that’s been cleaned out. I’m using an old Dr Thunder bottle because I’m a caffeine addict to such an extent that the savings over the “good stuff” is significant.

Hot water. If you have children and set your water heater accordingly, your water may not be hot enough. The water at my house is set pretty much as high as can be done with any semblance of sanity. If you find your tap water isn’t hot enough, just pour a bit of heated water into the bottle with hot tap water in it to make it warmer.

This is about as full as you want it to be. A little less than this would probably work better for you.
Turn the bottle upside down and let it “cook” like that for a little while. You want the plastic to heat up to the same temperature as the water so that it’s more pliable. Once it’s hot to the touch (not scalding or anything, just hot) you’re ready to start working.
As much as possible, do your work in or next to the bathtub so that if you have a water leak you don’t drench the wife’s favorite rug or something.

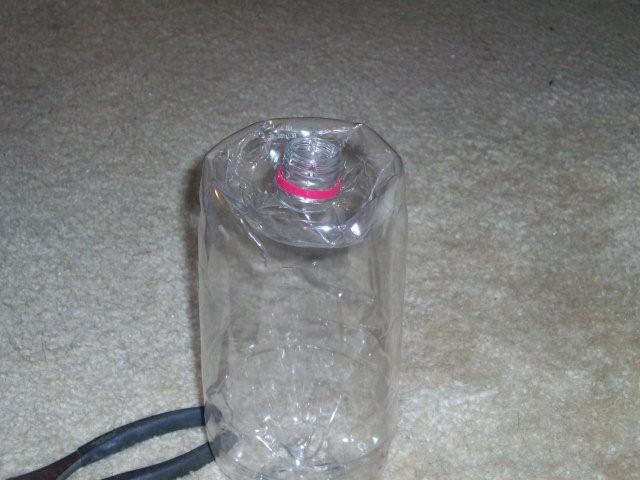
You can see we’ve jammed the nozzle in a bit. This is accomplished by simply pushing down on the bottle while it’s upside down. Don’t do this on the edge of the tub, I just have it sitting there for the picture. (If you try it on a slippery surface you’ll probably just hurt yourself. I pushed it on the carpet.) If you have any trouble getting the collapse started, try whacking it down on the floor. Be careful here, it’s certainly not easy to rupture a 2-liter bottle but don’t get carried away. Just a good thump is all you need, once it starts to bend you can work it with just a push.

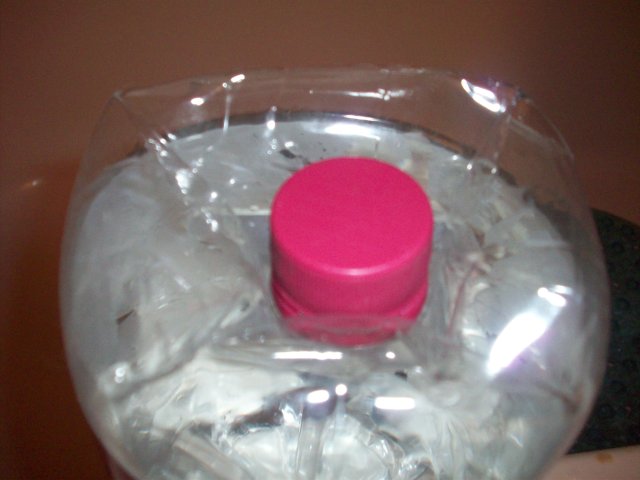
Here we’ve got near-full compression. To get to this point you have to turn the bottle upright, loosen the cap to let some air out, re-tighten it and then flip it over and push some more. Repeat that procedure several times until you’ve got what’s normally the top of the cap even with the rest of the plastic as seen here.

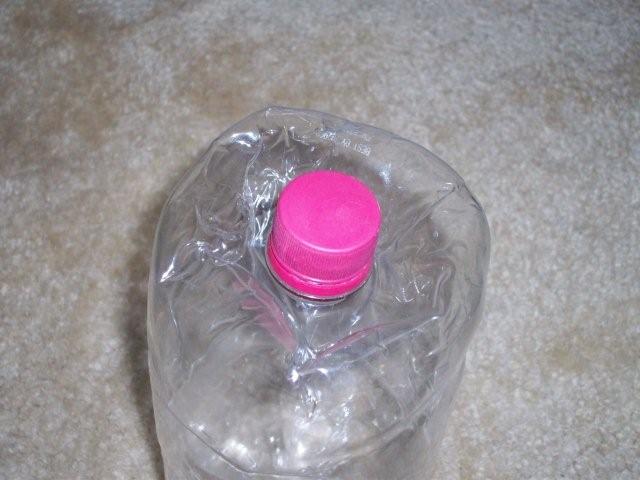
Now go around the rim and pinch the plastic to crease it as shown here. This is to produce a more even, consistent bottom all the way around.

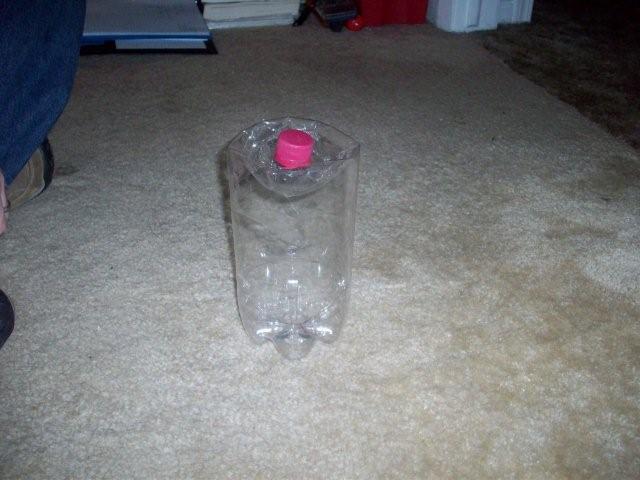
Like this. You can see there’s plenty of room around the cap here. We actually want to get rid of all that room because that’s space that roots and dirt could be, but mostly because that’s potential water storage area when the planter is turned over. To fill that out, flip the bottle over once more, push it solidly down against the floor, and then crush the sides inward with all your might. (Squeezing between your knees is a good way to put the larger muscles of your body to work.)
Basically you want to puff that part of the bottle out like a balloon.
Puffy! There’s a drawback to this – it’s now a royal pain in the backside to get the cap off if you did this right. I use a pair of pliers because I’m not patient enough to twist and twist with my fingers until it comes loose.
Finally, empty the bottle of as much water as you can (it won’t empty completely) and then chop the bottom off with a knife (don’t stab yourself). Once you’ve got a bit of a cut opened you can get the rest of the water out.

Finished product. You can see how the plastic bubble at the bottom looks like it’s “sucked in” against the nozzle. This maximizes the area at the bottom that can hold water – something a tomato plant can gulp down at an astonishing pace.
That’s it! Now for the optional stuff and installation of the plant.
For the standard plant installation (ie. a plant you bought at the store or have grown in a pot) see the Original Upside Down Tomato Post.

What’s this, a tiny seedling actually started in the planter? Yes!

What we have is an ordinary Jiffy starter with a tomato seed germinated in it until it was big enough to reach through the nozzle of the planter. We use the chopped off bottom of the planter as a water tray for the Jiffy starter before and after this step. Cut a coffee filter down to size and then cut a slit from the side to the middle and fit it around your plant like a Christmas tree skirt.
Now, holding the planter upside down (as pictured here) with one hand, carefully feed the JIffy starter, plant, and coffee filter upward until the plant is poking out the top. Holding them thusly, flip your hands over so that it’s right-side up (the plant is upside down). Put the water tray in, follow it with a cup (as shown here) or other object stable enough to support the whole thing, and flip it back over.
We want to grow the tomato right side up a bit longer, so that it can easily see around the planter to get delicious sunshine when it’s hanging. The step shown above lets us grow the tomato by carefully watering it through the nozzle.
NOTE: in these pictures you can see a distinct purple tint to the stem and underside of the leaves. This is a Phosphorus deficiency. I corrected this by feeding the seedling with water from my DWC hydroponic system.

Here’s a view of the whole thing. Now we’ll fast-forward to the final construction step.

We flip the planter “right-side up” and remove the water tray. This has the advantage of dumping the water into the planter and wetting the coffee filter. With it weighed down by the water, just flatten it out so it nicely blocks anything from getting through the nozzle. Note that the seedling still has a slight purple tint at the tips of the leaves but the stem is nice and green. The deficiency is clearing up.

Dump in a little soil to anchor everything in place.

Another shot, you can really see the fading purple of the phosphorus deficiency here.
Finish filling up the planter with your soil. I highly recommend using some good fertilizer for tomato plants if that’s what you’re putting in the planter. Tomatoes eat more than pretty much any other plant.

Not a great shot of the staple, but you can get the idea. Instead of tying it in place like the previous example, this time I just stapled the cloth cover to the rim of the planter. I folded it over the top and stapled through it and the plastic to form a good strong connection.

I also went a different route with the hanging of the planter. I took six strands of twine, tied them together at one end, and then knotted them to make a tight-fitting net. I used an unopened 2-liter as a form for this process so that it would fit properly – not too tight and not too loose. Be careful sliding the planter into this so as to not damage the small plant.

Here you can see the bottom. I used a prepared upside-down planter to measure out the length of the net, and then tied the opening much narrower so that the planter couldn’t slip out the bottom. It takes a little working to get the cloth cover straightened out and tucked in at the bottom, but it’s easily done. The extra length of netting can be used later as support for the vine, though if you start from a very small plant like this you’ll probably find it turns the corner and grows pretty much straight up the side of the planter. Which means you can carefully tie it to the netting there.

The finished product.
In case you’re curious, this is a Large Red Cherry tomato plant.